 Pin it
 The first time I attempted a Betty Boop cake, I stayed up until midnight surrounded by scattered fondant scraps and red food coloring stains on my favorite apron. My daughter had begged for this iconic character for her twelfth birthday, and somewhere between trying to get that perfectly glossy black hair just right and the white eyes to look playful instead of startled, I fell in love with the challenge of cartoon cake artistry. Now whenever I see someone struggling with fondant, I want to pull up a chair and show them how forgiving this medium can be.
Last summer, my niece watched wide-eyed as I shaped Betty Boops signature curls. She kept asking if the hair was real chocolate, and when I explained it was fondant, she demanded to try sculpting her own miniature version. We ended up with tiny Betty faces all over the kitchen counter, and honestly, those imperfect little creations made me smile more than the perfectly executed cake.
Ingredients
- All-purpose flour (2 cups): The foundation for that tender red velvet crumb, always fluff your flour before measuring for lighter texture
- Granulated sugar (1 ½ cups): Sweetens the cake while creating that delicate velvet texture, let it cream fully with butter for maximum aeration
- Baking powder (2 teaspoons): Gives the red layers their lift, make sure its fresh for the best rise
- Salt (½ teaspoon): Balances sweetness and enhances the vanilla, never skip this tiny but mighty ingredient
- Unsalted butter (½ cup plus ½ cup): Room temperature butter is nonnegotiable for both the cake and frosting, it should give slightly when pressed
- Large eggs (2): Bring them to room temperature too, cold eggs can curdle your batter and create dense spots
- Whole milk (¾ cup): Creates tenderness, whole milk makes a noticeably richer crumb than lower fat options
- Vanilla extract (2 teaspoons): Pure vanilla makes all the difference, imitation just cannot compete in a cake this special
- Red gel food coloring (1 tablespoon): Gel coloring delivers that deep cartoon red without thinning your batter like liquid does
- Cream cheese (8 ounces): Use full fat brick cream cheese, tub cream cheese contains thickeners that make frosting grainy
- Powdered sugar (4 cups): Sifting prevents lumps in your buttercream, those five minutes of sifting save you from gritty frosting
- Black fondant (8 ounces): Ready to use fondant saves time, knead it briefly until pliable before rolling
- White fondant (4 ounces): You will need less white than black, but keep extra on hand for those inevitable eye resizing moments
- Red fondant (2 ounces): A little goes a long way for those iconic lips, keep scraps wrapped tightly to prevent drying
- Edible pearl dust (1 teaspoon): Optional but adds that professional shimmer to lips and eyes, apply with a soft brush
- Cornstarch: Dust your work surface to prevent sticking, but use sparingly as too much dries out fondant
Tired of Takeout? 🥡
Get 10 meals you can make faster than delivery arrives. Seriously.
One email. No spam. Unsubscribe anytime.
Instructions
- Prepare your oven and pans:
- Preheat to 350°F and line two 8-inch round pans with parchment, greasing the sides generously to prevent sticking
- Whisk the dry ingredients:
- Combine flour, baking powder, and salt in a medium bowl, whisking thoroughly to ensure even distribution of leavening
- Cream butter and sugar:
- Beat on medium speed for exactly 3 minutes until pale and fluffy, scraping down the bowl halfway through
- Add eggs and vanilla:
- Add eggs one at a time, beating for 30 seconds after each, then mix in vanilla until fully incorporated
- Combine wet and dry:
- Alternate adding flour mixture and milk in three additions, beginning and ending with flour, mixing until just combined
- Transform to red:
- Add gel food coloring and mix until no streaks remain, the color should be vibrantly cartoon red
- Bake the layers:
- Divide batter evenly between pans and bake 25 to 30 minutes, rotating pans halfway, until a toothpick comes out clean
- Cool completely:
- Let cakes rest in pans for 10 minutes before inverting onto wire racks, they must be fully cooled before frosting
- Make the buttercream:
- Beat cream cheese and butter until smooth, then gradually add powdered sugar, beating until fluffy
- Level and stack:
- Trim cake domes with a serrated knife, then stack layers with buttercream between them
- Apply crumb coat:
- Spread a thin layer of buttercream over the entire cake, then chill for 20 minutes until set
- Final coat:
- Apply remaining buttercream and smooth sides and top with a cake scraper, working quickly to prevent tearing
- Roll black fondant:
- Dust surface with cornstarch and roll fondant to 1/8 inch thickness, cut out Betty Boops hair silhouette
- Create facial features:
- Roll white fondant into circles for eyes with tiny heart highlights, shape red fondant into lips
- Assemble the face:
- Drape black fondant hair over the chilled cake, attach eyes and lips with small dabs of buttercream
- Add details:
- Shape eyelashes and eyebrows from black fondant, add a red headband coil if desired, then rest 30 minutes before serving
 Pin it
 The moment my daughter saw her cake, she gasped and immediately reached for her phone to show everyone. That perfectly imperfect Betty Boop face, with one slightly larger eye and a lip that had cracked during transfer, became the highlight of her party.
Working With Fondant
Fondant responds to temperature and humidity like a moody artist. Warm hands make it sticky and impossible to roll thin, while cold hands cause it to crack and tear. I learned to keep a small bowl of ice water nearby, dipping my fingers for 30 seconds when the fondant starts fighting back.
Getting That Cartoon Red
Red food coloring is notoriously deceptive. What looks like enough in the bowl will bake into a disappointing pale pink. I add coloring gradually, mixing thoroughly and letting the batter sit for five minutes before deciding if it needs more. That short waiting period allows the color to develop fully.
Making Fondant Decorations Ahead
You can create Betty Boops facial features up to two days before decorating. Store them flat between layers of parchment paper in an airtight container at room temperature. This head start gives you time to focus entirely on assembly day, when the pressure feels highest.
- Keep fondant scraps wrapped in plastic to prevent them from drying out
- Dust your work surface lightly but frequently, sticky fondant absorbs prints
- Have extra white fondant on hand, eyes often need multiple attempts
 Pin it
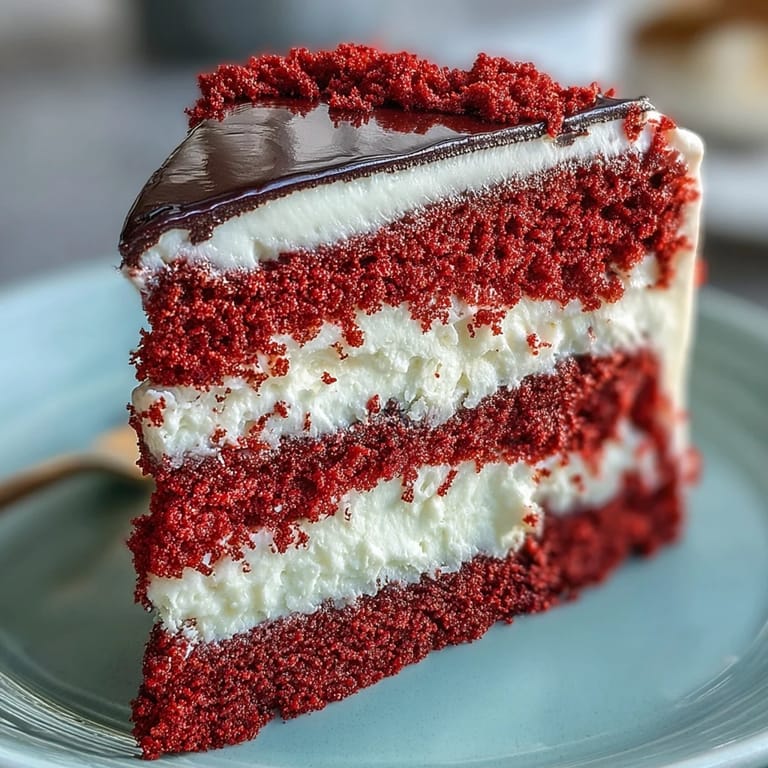
 There is something magical about turning a childhood cartoon into an edible centerpiece. Every slice reveals that happy surprise of red velvet against creamy white frosting, and honestly, that is better than any cartoon could ever be.
Recipe FAQs
- → How far ahead can I prepare the fondant decorations?
Roll and cut all fondant elements up to 24 hours in advance. Store in an airtight container at room temperature, separated by parchment paper to prevent sticking. The black hair silhouette, white eyes, and red lips will remain pliable for easy attachment.
- → What's the best way to achieve deep red color without altering taste?
Use high-quality gel food coloring rather than liquid versions. Gel provides concentrated pigment without adding excess moisture to your batter. Start with one tablespoon and add more gradually until reaching the desired vibrant crimson hue.
- → Can I make the layers ahead of time?
Bake and cool completely, then wrap each layer tightly in plastic wrap followed by aluminum foil. Freeze for up to 2 weeks. Thaw overnight in the refrigerator before frosting and decorating. Bring to room temperature for 30 minutes before final assembly.
- → Why does my cream cheese frosting sometimes become too soft?
Room temperature ingredients are crucial, but avoid over-beating which can cause excessive softening. Chill your frosted cake for 20 minutes between the crumb coat and final layer. If working in a warm kitchen, refrigerate periodically during decoration.
- → What if I don't have fondant tools for the decorative details?
Use common kitchen items as substitutes: round cookie cutters or shot glasses for eyes, a sharp paring knife for freehand cutting the hair silhouette, and toothpicks for adding texture. Roll fondant between two sheets of parchment for even thickness.
- → How do I prevent the fondant from sagging on the cake sides?
Ensure your buttercream is thoroughly chilled before applying fondant. The cold frosting creates a stable surface. Work quickly once removing the cake from refrigeration, and support larger fondant pieces with your hand until they adhere properly.