 Pin it
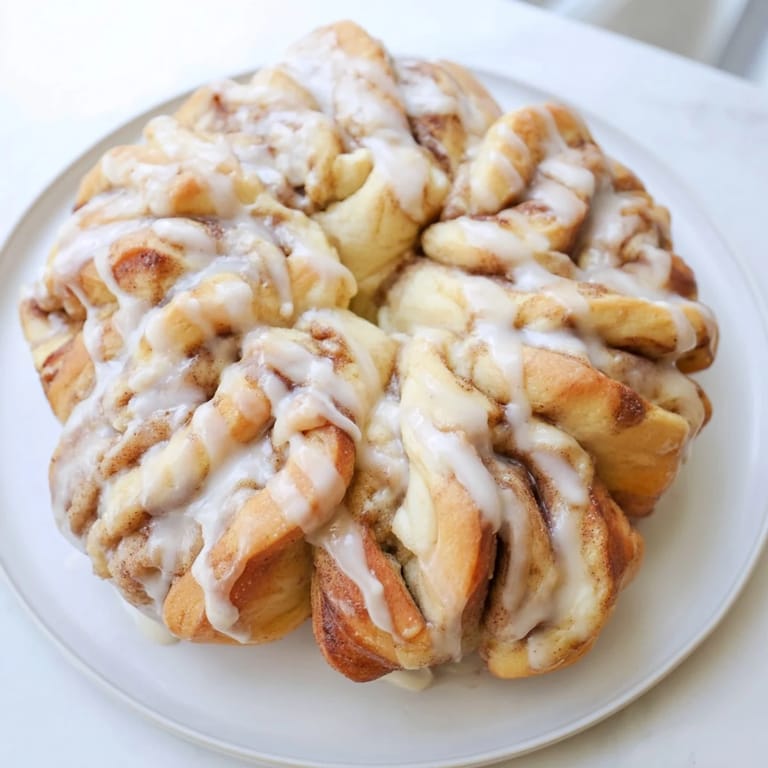
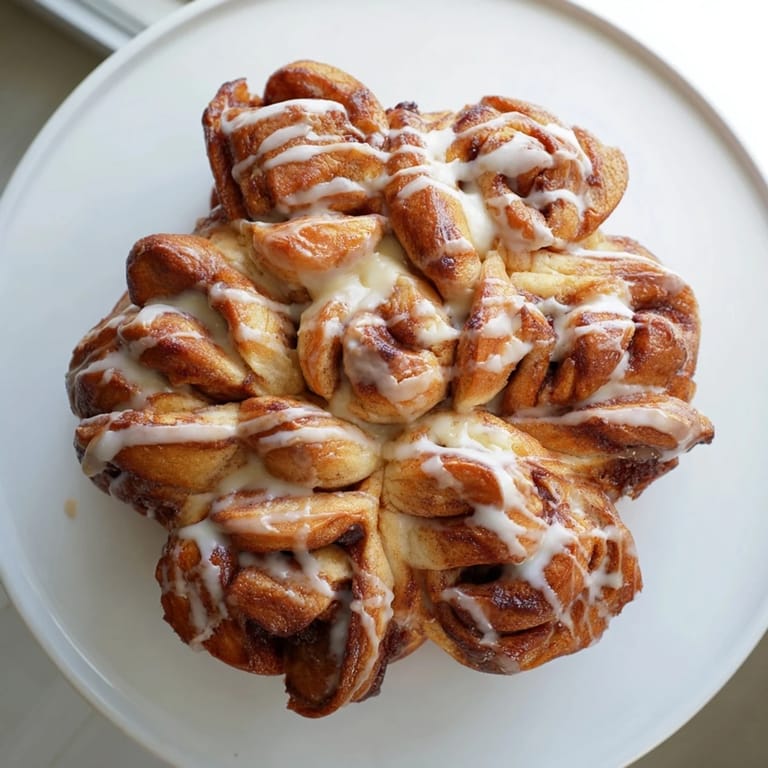
 There's something about the smell of cinnamon and yeast rising in a warm kitchen that stops time. Years ago, I was browsing a holiday baking magazine in a coffee shop, half-listening to carols, when I spotted a photo of a cinnamon roll shaped like a snowflake. It seemed impossibly complicated, but I couldn't stop thinking about it. Three days later, flour dusting my apron and my kitchen smelling like a bakery, I pulled the first one from the oven golden and perfect. Now it's become my winter tradition, the kind of recipe I make when I want to turn an ordinary morning into something magical.
I made this for a quiet Sunday morning with my sister, who'd driven hours through early snow to visit. We stood in the kitchen in matching fuzzy socks, drinking coffee while it baked, and when I pulled it out and drizzled that vanilla icing over the warm snowflake, she just quietly said, 'This is perfect.' No fancy brunch, no fuss—just warm bread and the kind of moment that matters.
Ingredients
- All-purpose flour (3 1/4 cups): The foundation of everything; don't skip the measuring by weight if you can, since it's more accurate than spooning and leveling.
- Active dry yeast (2 1/4 tsp): The magic ingredient that makes this rise—make sure it smells slightly beer-like and fresh, a sign it's alive and ready to work.
- Warm milk (3/4 cup): Think bathwater temperature, not hot; too much heat kills the yeast before it can do its job.
- Granulated sugar (1/4 cup): Feeds the yeast and adds subtle sweetness to the dough itself.
- Unsalted butter (1/4 cup melted for dough, 1/4 cup softened for filling): Melted butter whisks in smoothly; softened butter spreads without tearing the delicate dough layers.
- Large egg (room temperature): Brings richness and helps bind everything together for that tender crumb.
- Salt (1/2 tsp): Don't skimp—it balances sweetness and strengthens the gluten structure.
- Packed light brown sugar (1/2 cup): Slightly moist and molasses-tinged, it creates that signature cinnamon swirl depth.
- Ground cinnamon (2 tsp): Use fresh cinnamon if you can; it's worth sniffing the container first to make sure it still smells warm and spicy.
- Powdered sugar (1 cup): Creates the smooth, sweet icing drizzle that crowns the whole thing.
- Pure vanilla extract (1/2 tsp): A small amount goes a long way in the icing; real vanilla tastes noticeably better.
Tired of Takeout? 🥡
Get 10 meals you can make faster than delivery arrives. Seriously.
One email. No spam. Unsubscribe anytime.
Instructions
- Wake up the yeast:
- Pour warm milk into your mixing bowl, sprinkle in the yeast, add a pinch of sugar, and let it sit undisturbed for about five minutes. You'll see it bubble and foam—that's the sign it's alive and ready to work its magic.
- Build the dough:
- Stir in melted butter, your egg, and salt into the yeasty milk, then gradually add flour, mixing until a shaggy dough comes together. Don't worry if it looks rough at this stage; you're about to knead it into submission.
- Knead until smooth:
- Turn the dough onto a lightly floured surface and knead for about five to seven minutes, pushing it away with the heel of your hand, folding it back, repeating until it feels smooth and springs back when you poke it. It should be soft but not sticky.
- Let it rise:
- Transfer the dough to a greased bowl, cover it loosely with plastic wrap or a damp towel, and set it in a warm corner of your kitchen for an hour. You'll know it's ready when it's roughly doubled in size and jiggles slightly when you give the bowl a gentle shake.
- Prep the layers:
- Heat your oven to 350°F and line a baking sheet with parchment. Punch down the risen dough—this is surprisingly satisfying—then divide it into three equal pieces and roll each into a thin twelve-inch circle.
- Create the filling:
- Mix brown sugar and cinnamon in a small bowl. Place your first dough circle on the baking sheet, spread half the softened butter over it, sprinkle with half the cinnamon sugar, then layer the second circle on top, repeat with remaining butter and cinnamon sugar, and finish with the third circle.
- Cut into petals:
- Place a small glass in the center of your dough stack—this anchors everything and prevents the center from tearing. Using a sharp knife, cut outward from the glass in sixteen equal strips, creating radiating lines like rays of sun.
- Twist the snowflake shape:
- Working methodically, take two adjacent strips, twist them away from each other twice in opposite directions, then pinch the ends together to create a pointed petal. Repeat with every pair, working your way around until the snowflake shape emerges.
- Final rise:
- Remove the glass carefully, cover the snowflake loosely with a towel, and let it rise for about fifteen minutes while your oven finishes preheating. This short rise keeps the dough tender.
- Bake until golden:
- Slide it into the oven and bake for twenty-two to twenty-five minutes, watching until the top and edges turn a deep golden brown. The whole kitchen will smell incredible during this part.
- Finish with icing:
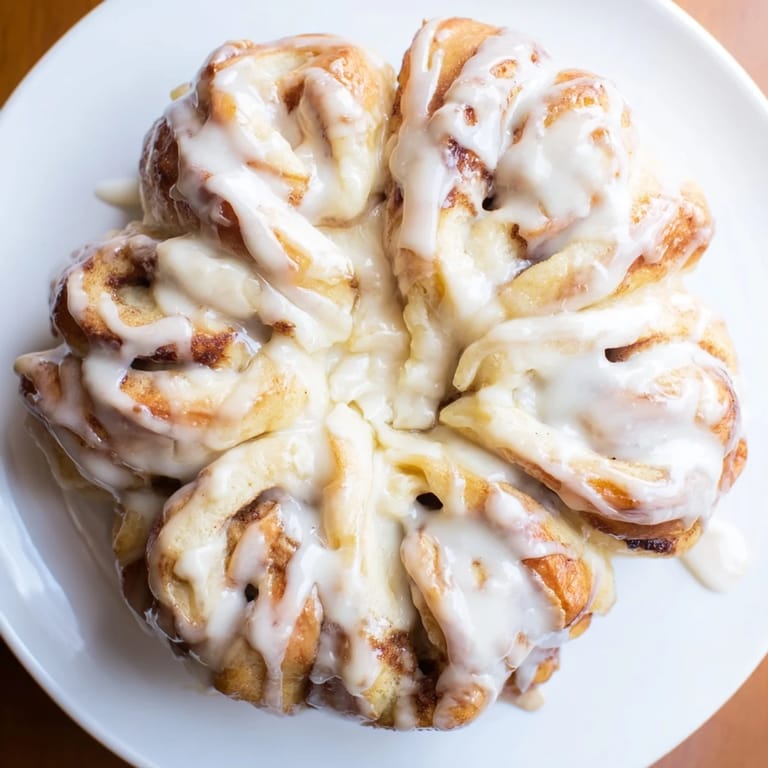
- While it's still warm, whisk together powdered sugar, milk, and vanilla until smooth and drizzle it generously over the warm snowflake, letting it pool slightly into the crevices. Serve it pull-apart style, letting people tear off their own petals.
 Pin it
 One winter morning, my neighbor knocked on the door with a handful of fresh cardamom pods, asking if I'd ever tried adding them to my cinnamon rolls. We didn't even taste it before baking—we just giggled at the audacity and threw a few ground pods into the filling anyway. It became something entirely new: still recognizable as the snowflake she'd seen through my kitchen window, but suddenly more complex, more exciting. That's when I realized this recipe is really just a canvas.
A Word on Technique
The twist is everything here. When you're turning those strips, don't overthink it—two full rotations away from each other, then pinch firmly at the ends. I've seen people tie them into complicated knots, and honestly, it doesn't matter as much as committing to the motion and pinching tight so the petals stay defined during baking. The first time I made this, I was so nervous about getting it perfect that I moved slowly and carefully, checking angles constantly. The second time, I just moved confidently and let my hands figure it out. The second snowflake looked significantly better.
Make It Your Own
This recipe absolutely sings with simple cinnamon and brown sugar, but it's also forgiving enough to play with. I've added chopped toasted pecans to the filling for crunch, scattered raisins for chewiness, and even dabbled with cardamom and a whisper of nutmeg when I was feeling experimental. A friend swears by substituting a quarter of the milk with heavy cream for an even richer dough. The structure stays solid no matter what you layer in there.
Pairing and Serving
This snowflake tastes best still warm or at room temperature on the day it's baked, though I've found it keeps beautifully wrapped in foil for the next morning. Serve it alongside strong hot chocolate, good coffee, or chai tea if you're feeling fancy. I've also given these as winter gifts wrapped in festive paper, and somehow a homemade cinnamon roll snowflake says 'I thought of you' in a way store-bought treats never can.
- Slice into the icing with a warm knife if it hardens, and it flows smooth and glossy again.
- Make the dough the night before, refrigerate it, and bake fresh in the morning for maximum convenience.
- Eat with your hands and enjoy every sticky, cinnamon-sugar-dusted moment.
 Pin it
 There's something genuinely joyful about pulling this from the oven and watching someone's face light up when they realize it's pull-apart. It's been my winter morning tradition for years now, and it never gets old.
Recipe FAQs
- → How do I achieve the soft texture?
Use warm milk and knead the dough thoroughly to develop gluten, then allow sufficient rising time for a pillowy finish.
- → Can I add nuts or raisins?
Yes, incorporating chopped toasted pecans or raisins into the filling adds texture and subtle flavor variations.
- → What is the purpose of the glass during shaping?
The glass is placed in the center to prevent cutting through the middle, allowing for even strips radiating outward to form the snowflake pattern.
- → How should the icing be applied?
Whisk the icing ingredients until smooth and drizzle over the warm baked dough for a sweet finishing touch.
- → Can I substitute any ingredients for a richer dough?
Substituting half the milk with heavy cream enriches the dough, offering a more tender and flavorful bite.