 Pin it
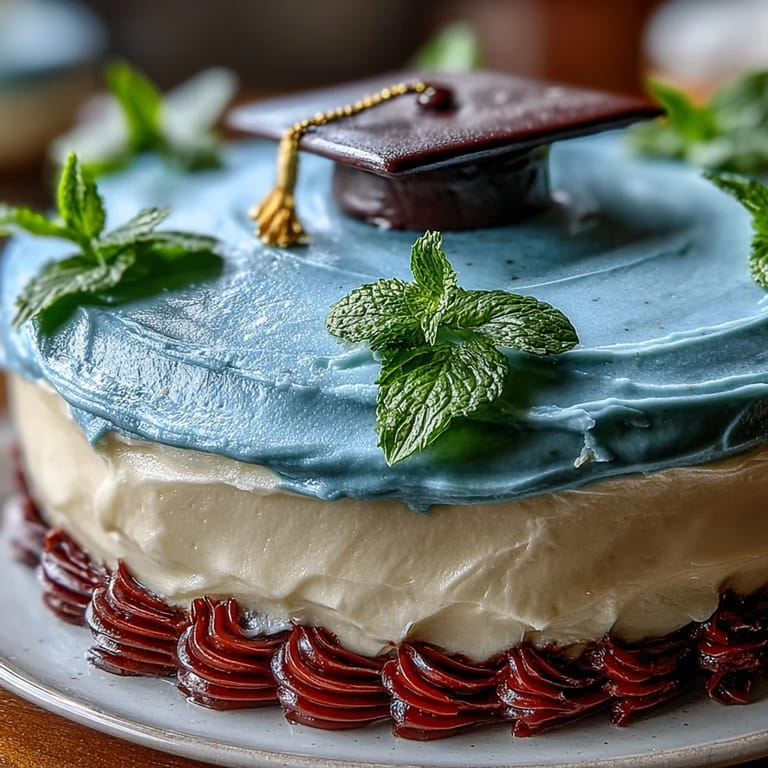
 My neighbor texted me three months before her daughter's graduation asking if I could make something special. I'd never attempted a decorated celebration cake before, but something about the challenge excited me. Standing in her kitchen on that warm June afternoon, surrounded by mixing bowls and the smell of vanilla cake baking, I realized this wasn't just about flour and sugar. It was about marking a moment when someone steps into something new, and food has a quiet way of making those moments stick.
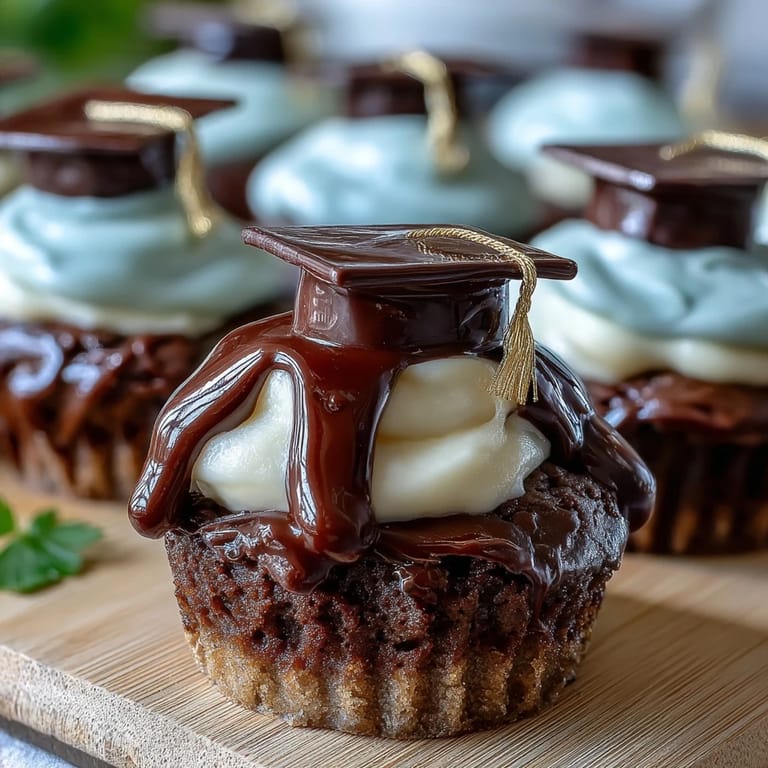
What I didn't expect that June afternoon was how the decorating part would become its own celebration. My neighbor's daughter came home from her last day of school while I was placing the gold foil, and she actually sat on the counter eating buttercream straight from the piping bag, laughing about making it messier. By the time we added that diploma topper, the cake had become less about perfection and more about the three of us standing there, exhausted and happy, knowing that when people cut into it at her party, they'd remember this moment too.
Ingredients
- All-purpose flour (2 ½ cups): The foundation of your cake, and sifting it together with the baking powder ensures even lift without lumps that sneak into bites.
- Baking powder (2 ½ tsp): This is your rise, so don't skip it or reduce it thinking you're being healthy; the cake needs this chemical reaction to stay light.
- Salt (½ tsp): A pinch that makes everything taste more like itself, especially important in vanilla cakes where nothing else competes for attention.
- Unsalted butter, softened (1 cup for cake, 1 ½ cups for frosting): Room temperature butter creams properly with sugar, trapping air that makes the cake tender and the frosting fluffy.
- Granulated sugar (2 cups): This creams with butter into pale fluff, a step that takes about three to four minutes and actually matters for texture.
- Eggs, room temperature (4 large): Cold eggs won't incorporate smoothly, so pull them out of the fridge while your oven preheats.
- Vanilla extract (1 tbsp cake, 2 tsp frosting): Use real vanilla if you can; the flavor difference shows up clearly in something this simple.
- Whole milk, room temperature (1 cup for cake, 3-4 tbsp for frosting): Temperature matters because cold milk seized into your warm batter creates weird texture, so let it sit on the counter.
- Powdered sugar, sifted (5 cups for frosting): Sifting removes lumps that would give your frosting that grainy mouthfeel that doesn't feel luxurious.
- Edible gold foil sheets: Delicate and gorgeous, these transform a simple cake into something that looks like it belongs at a celebration.
- Diploma-shaped cake topper: Either buy one that feels right to you or make it from fondant rolled thin and shaped while still pliable.
Tired of Takeout? 🥡
Get 10 meals you can make faster than delivery arrives. Seriously.
One email. No spam. Unsubscribe anytime.
Instructions
- Get your mise en place ready:
- Preheat your oven to 350°F, grease two 9-inch round pans with butter, and line them with parchment paper so your cakes slide out without sticking or breaking. Having everything prepped means you're not scrambling once you start mixing, which keeps you calm and your batters at the right temperature.
- Build your dry foundation:
- Whisk flour, baking powder, and salt together in a medium bowl, which distributes the rising power evenly. This step takes two minutes but makes the difference between a flat cake and one with gentle, consistent rise.
- Cream butter and sugar until it's pale and fluffy:
- Beat them together on medium-high speed for three to four minutes, stopping to scrape the bowl halfway through. You're looking for something the color of wet sand, which means you've trapped enough air for the cake to rise.
- Add eggs carefully, one at a time:
- Beat well after each addition so they incorporate fully rather than making the batter look curdled. If it does look separated, don't panic; a bit more mixing will bring it back together.
- Add the vanilla and begin alternating:
- Stir in your vanilla, then add your flour mixture and milk in three additions, starting and ending with flour. This pattern prevents overmixing, which is how you end up with tough cake instead of tender crumb.
- Divide and smooth:
- Pour batter evenly between your two pans and smooth the tops with an offset spatula so they bake level. Uneven tops lead to wonky layers, and while you can trim them, prevention is easier.
- Bake until golden and set:
- Bake for 28 to 32 minutes, checking at 28 by inserting a toothpick in the center. It should come out clean or with just a crumb or two, not wet batter.
- Cool strategically:
- Let cakes rest in their pans for 10 minutes, which lets them set enough to handle, then turn them out onto cooling racks. This prevents them from baking further in the residual heat, which makes them dry.
- Make your frosting while cakes cool completely:
- Beat softened butter on high speed for about three minutes until it's pale and creamy, then gradually add sifted powdered sugar a cup at a time. Once it looks like it might be too thick, add vanilla, salt, and milk one tablespoon at a time until you reach a consistency that spreads smoothly without being greasy.
- Level and layer:
- If your cooled cakes have domed tops, use a serrated knife to trim them flat, then place one layer on your serving plate. Spread a thick, generous layer of frosting on top, then place the second layer over it.
- Apply a crumb coat and chill:
- Spread a thin layer of frosting all around the cake to seal in crumbs, then refrigerate for 30 minutes. This step prevents crumbs from disrupting your final frosting layer.
- Frost smoothly with your final layer:
- Use your offset spatula dipped in warm water to smooth out the frosting, working from the sides and then the top. Take your time here; this is what people see.
- Apply gold foil with care and intention:
- Using tweezers, place sheets of edible gold foil onto the frosting in a pattern that feels right to you, whether that's random artistic placement or a deliberate design. The tweezers keep your hands from warming and damaging the delicate foil.
- Crown it with your diploma topper and any finishing touches:
- Place the diploma topper at the center or slightly off to one side, then add sprinkles or confetti if you want extra celebration. A brief chill helps everything set, but serve the cake at room temperature so the frosting is soft and the flavors sing.
 Pin it
 The moment I'll never forget is when they cut into that cake at the party and the first person bit into it and their eyes lit up like they weren't expecting something homemade to actually taste good. That's when I understood that a graduation cake isn't really about celebrating finishing high school; it's about making something beautiful and delicious for someone on a day when they're already feeling seen by the people they love.
Vanilla Cake Wisdom
Simple vanilla cakes teach you how to bake because nothing hides behind chocolate or spice. The first time I made one for my own family, I realized that a truly good vanilla cake is about precision and respect for the process. Temperature matters, timing matters, and not taking shortcuts matters. Once I stopped rushing, cakes became consistently tender and actually flavorful instead of tasting like sweet air.
The Art of Buttercream Frosting
Buttercream seems scary until you understand it's just butter and sugar having a conversation through an electric mixer. The key is patience during the creaming stage and gradual addition of powdered sugar so you don't create a dry, grainy frosting. I learned this by making frosting too fast once and ending up with something that looked curdled, then discovering that a few more minutes of beating brought it back to creamy perfection. Now I use the same frosting for everything from simple layer cakes to elaborate decorating because once you understand the ratio, it's endlessly reliable.
Gold Foil Decorating and Celebration Cake Finishing
Edible gold foil is the secret weapon of celebratory cakes because it looks impossibly luxurious while requiring minimal skill or time. The first time I used it, I was terrified I'd ruin it, but I learned that a light touch with tweezers and dry hands is all you need. Think of it as gilding, like you're adding whispered elegance to something already beautiful. The diploma topper transforms the cake from pretty to purposeful, turning it into a statement about why you're gathered around it.
- Gel food coloring lets you match the buttercream to school colors without making the frosting too thin or wet.
- If you're making a fondant diploma, roll it thin and keep an edible marker nearby so you can add details like a ribbon or the graduate's name.
- Chill the finished cake for at least 30 minutes before serving so the gold foil stays intact and the frosting is firm enough to slice cleanly.
 Pin it
 Making a graduation cake is about more than following instructions; it's about showing up for someone on a day that matters. Every layer of buttercream and shimmer of gold foil carries the message that you think they're worth the effort.
Recipe FAQs
- → What type of flour is used in this cake?
All-purpose flour is used to create a balanced texture that's tender yet sturdy enough to hold the layers and decorations.
- → How is the gold foil applied safely?
Edible gold foil is handled carefully with tweezers or dry hands to avoid tearing, and applied gently onto the frosting surface after chilling.
- → Can the diploma topper be homemade?
Yes, the diploma topper can be crafted from fondant or paper, allowing customization and full edibility if fondant and food-safe markers are used.
- → What makes the buttercream smooth and creamy?
Beating softened butter at high speed until pale and gradually incorporating sifted powdered sugar and milk creates a light and spreadable buttercream.
- → Is this cake suitable for special dietary needs?
This version is vegetarian-friendly but contains gluten, eggs, and dairy. Check decorations for possible soy allergens.
- → How can I enhance the flavor of the sponge?
Adding almond extract to the batter adds a nutty aroma that complements the vanilla base without overpowering it.